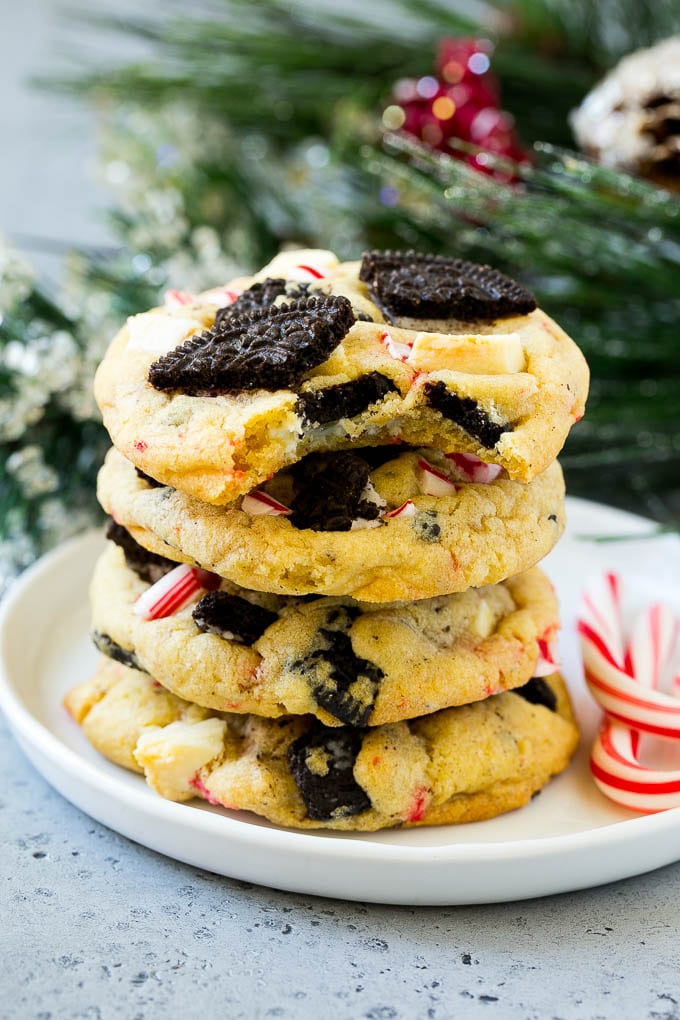
These peppermint cookies are loaded with white chocolate chunks, candy canes, and Oreo pieces for a unique holiday cookie that everyone will love!
I’ve combined Oreo cookies, candy canes and white chocolate in a soft and tender vanilla cookie for a Christmas treat that’s perfect for cookie exchanges, class parties and gift giving. Looking for more cookie recipes? Don’t miss my Italian cookies , thumbprint cookies and stained glass cookies !

There’s nothing better than some sweet Christmas recipes , and these peppermint cookies are just loaded with fun additions. Who can resist a sprinkling of candy canes, Oreo cookies and white chocolate all in one place? They’re perfect for your holiday cookie tray.
- Peppermint Cookies Ingredients
- How Do You Make Peppermint Cookies?
- Tips For The Perfect Cookies
- Quick Tip
- Recipe FAQs
- Flavor Variations
- More Christmas Treats
- Love This Recipe?
- Peppermint Cookies Recipe
Peppermint Cookies Ingredients
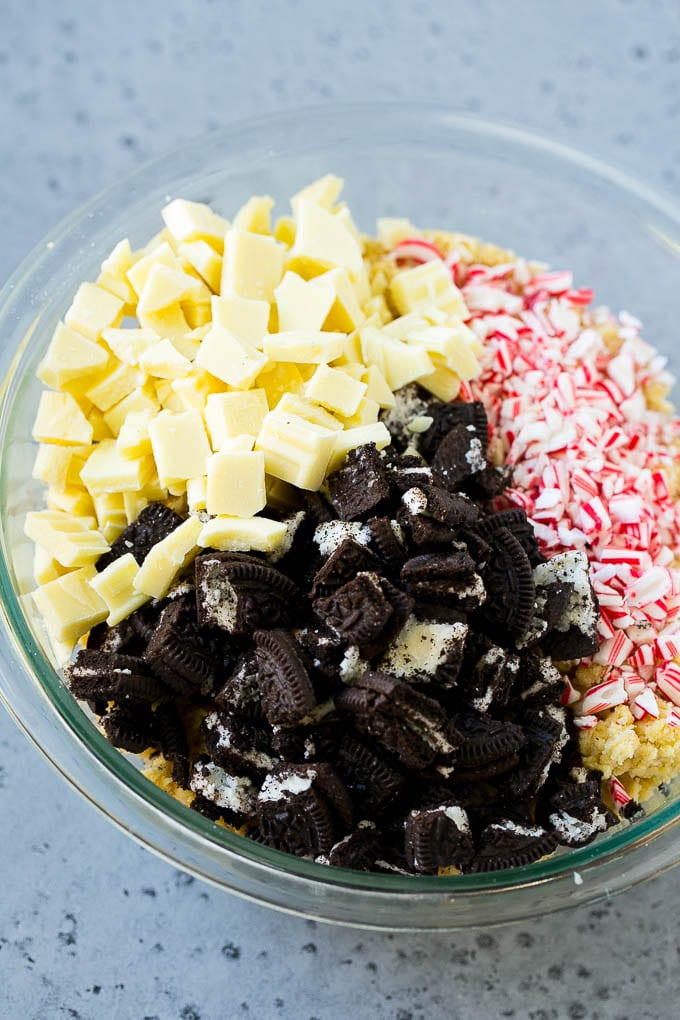
To make these chewy cookies, you will need butter, granulated sugar, brown sugar, eggs, vanilla extract, peppermint extract (optional), all purpose flour, salt, instant vanilla pudding mix, baking soda, Oreo cookies, white chocolate and crushed candy canes.
How Do You Make Peppermint Cookies?
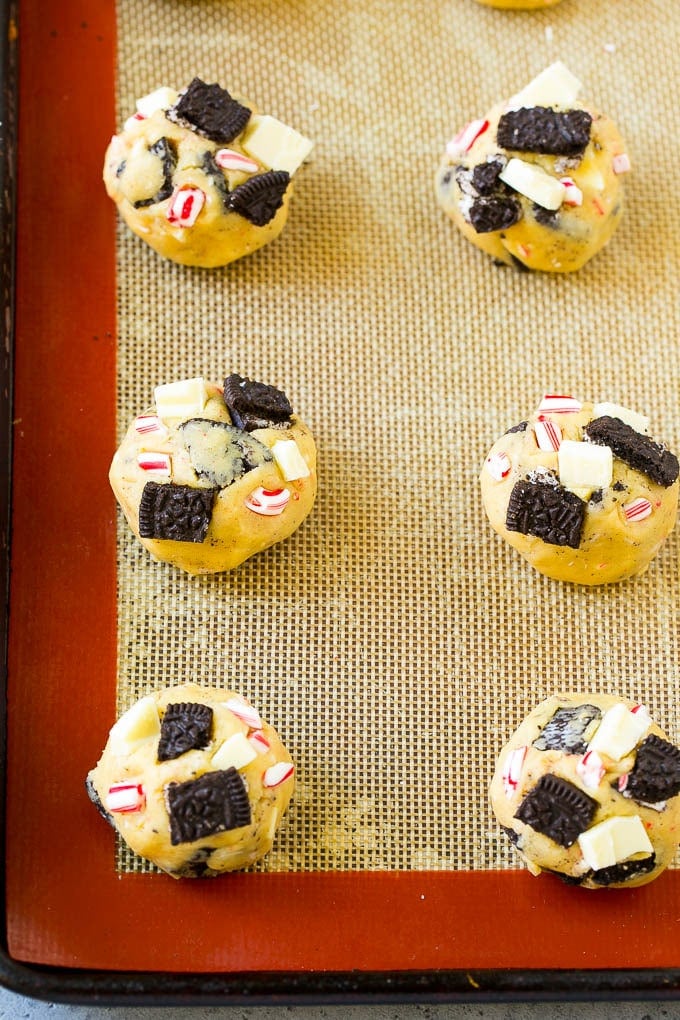
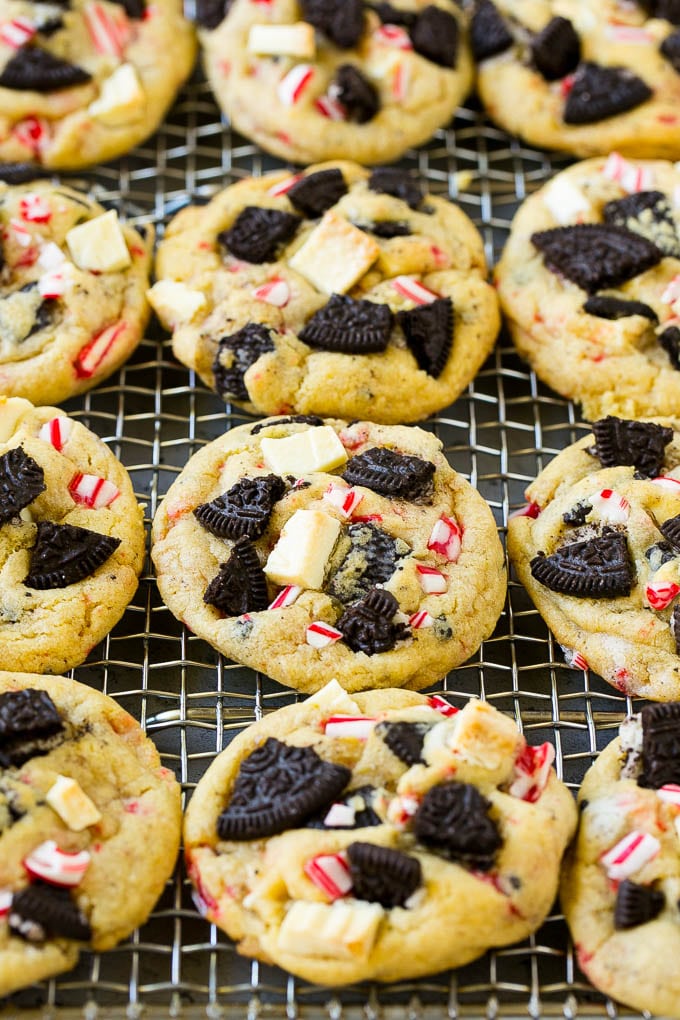
Preheat the oven, and line a baking sheet with either parchment paper or a nonstick baking mat. Place the butter and both types of sugar in the bowl of a stand mixer, and cream until light and fluffy. Add the eggs and extracts, then beat to combine. Next add the flour, salt, pudding mix and baking soda. Mix until everything is just blended. Fold in most of the cookies, white chocolate and candy canes. Place cookie dough balls on the sheet pan, and press the remaining Oreos, white chocolate and candy canes into the top of the cookies. Bake, then cool on a wire rack. Serve and enjoy.
Tips For The Perfect Cookies
- Keep your Oreo cookies in larger pieces – if you chop them too finely your cookies will turn gray.
- I use chopped white chocolate bar versus chips because I like a chunkier cookie. Also, white chocolate baking bars typically contain real cocoa butter. The bars also taste better than white chocolate chips, as most brands contain palm oil.
- After you’ve rolled your cookie dough into balls, you can press some pieces of Oreo, chocolate and candy cane on top for a nice presentation .
- Store your peppermint cookies for up to 4 days in an airtight container at room temperature.
- The peppermint extract in this recipe is optional. If you love a minty cookie, definitely add it. If you prefer a more subtle mint flavor, you can omit it.
Quick Tip
Peppermint cookies are not a great candidate for the freezer because when you thaw them, the peppermint pieces will get sticky.
The easiest (and cleanest!) way to crush candy canes is to unwrap them, then place them in a heavy duty resealable plastic bag. Use the flat end of a meat mallet or a rolling pin to lightly crush the candy canes, then open the bag and pour the candy into your mixing bowl.
Peppermint cookies contain butter, flour, sugar, peppermint flavor and crushed peppermints or candy canes.
FOLLOW ME
Flavor Variations
These cookies are delicious as-is, but you can customize some of the ingredients to suit your tastes.
- Chocolate: Instead of white chocolate, try using dark chocolate or milk chocolate chunks. You can also use peppermint chocolate such as Andes mints or even peppermint bark .
- Peppermint: No candy canes on hand? Use some crushed peppermint candy rounds instead.
- Oreos: While this recipe calls for regular flavored Oreos, there are so many different Oreos, especially around the holidays! Try using a cookie with mint or chocolate filling.
I love to bring these cookies to holidays because they’re really a unique offering, and I always get so many requests for the recipe! I make them every year and I’m sure you will too once you give this recipe a try.
More Christmas Treats

Peppermint Patties Recipe
11 mins
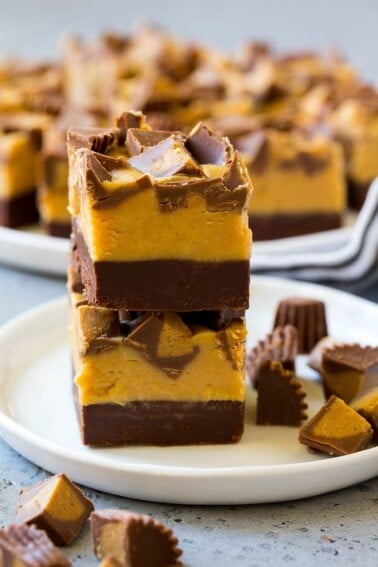
Chocolate Peanut Butter Fudge
10 mins
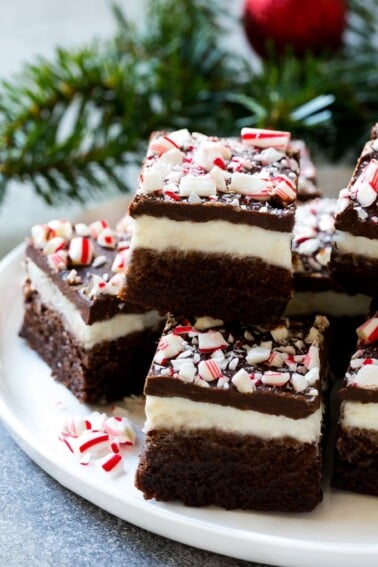
Peppermint Brownies
1 hr 10 mins

Red Velvet Cookies
35 mins

Reindeer Chow
11 mins
Love This Recipe?
Ingredients1x2x3x
- ▢ 3/4 cup butter softened
- ▢ 1/2 cup granulated sugar
- ▢ 1/2 cup brown sugar
- ▢ 2 eggs
- ▢ 1 teaspoon vanilla extract
- ▢ 1 drop pure peppermint extract optional if you like your cookies to have a more pronounced mint flavor
- ▢ 2 1/4 cups all purpose flour
- ▢ 1/4 teaspoon salt
- ▢ 3.4 ounce box instant vanilla pudding mix
- ▢ 1 teaspoon baking soda
- ▢ 1 cup Oreos chopped
- ▢ 1 cup white chocolate chips or chunks cut from a bar of white chocolate
- ▢ 1/2 cup crushed candy canes or peppermints
Instructions
- Preheat the oven to 350 degrees F. Line a baking sheet with parchment paper or a nonstick baking mat.
- Place the butter, granulated sugar and brown sugar in the bowl of a mixer. Beat until light and fluffy, about 3 minutes.
- Add the eggs, vanilla extract and peppermint extract (if using). Beat until combined.
- Add the flour, salt, pudding mix and baking soda to the bowl. Mix on low speed until just combined.
- Fold in 3/4 of the Oreos, white chocolate and candy canes.
- Take 2 tablespoons of dough and roll it into a ball. Repeat with remaining dough.
- Place the balls of dough 2 inches apart on a baking sheet. You will need to bake the cookies in batches.
- Press the remaining Oreos, candy canes and white chocolate onto the tops of the balls of dough.
- Bake the cookies for 10-12 minutes or until light brown at the edges.
- Cool the cookies on the pan for 10 minutes, then transfer to a cooling rack.
- Repeat the baking process with the remaining dough.
- Serve immediately or store in an airtight container for up to 4 days.
Notes
- Keep your Oreo cookies in larger pieces – if you chop them too finely your cookies will turn gray.
- I use chopped white chocolate bar versus chips because I like a chunkier cookie. Also, white chocolate baking bars are often made with real cocoa butter and taste better than white chocolate chips, which are often made with palm oil.
- After you’ve rolled your cookie dough into balls, you can press some pieces of Oreo, chocolate and candy cane on top for a nice presentation.
Nutrition

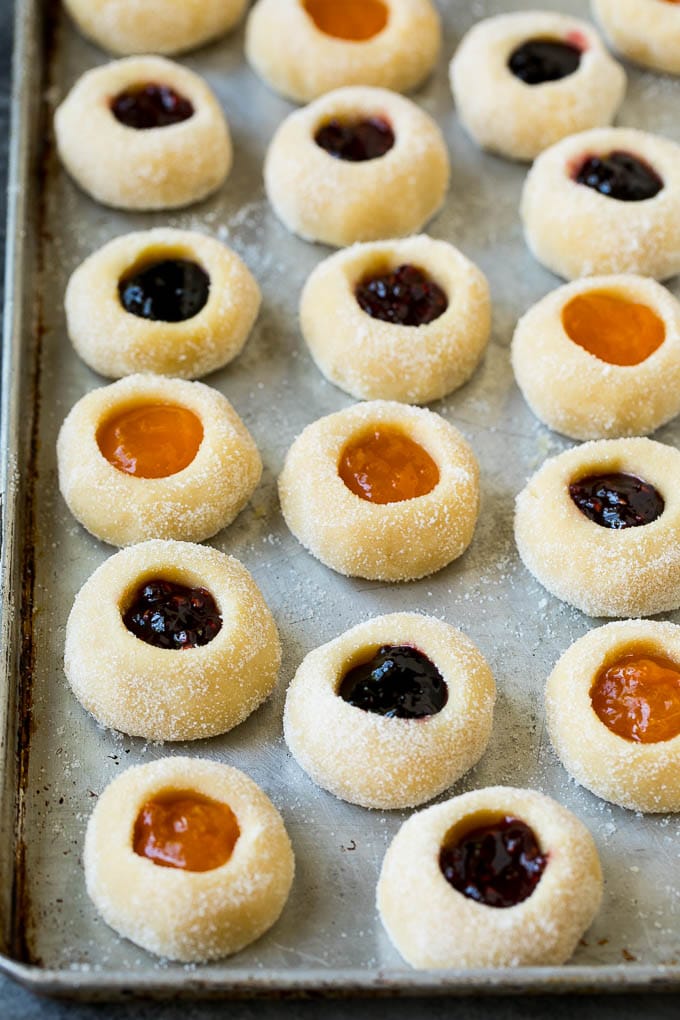
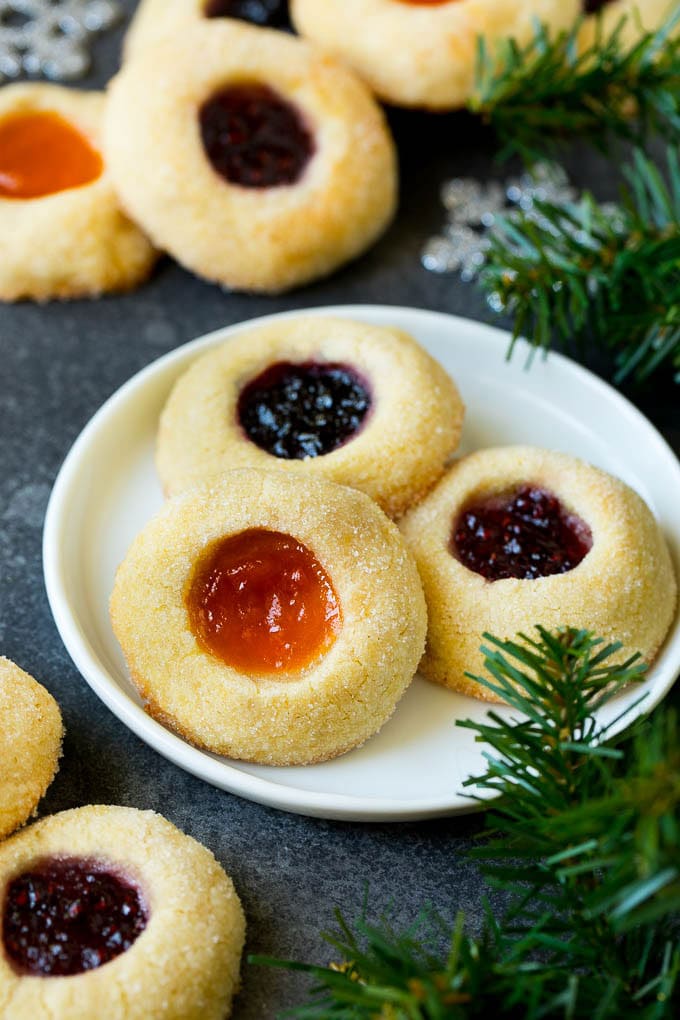
These thumbprint cookies are soft vanilla cookies filled with fruit jam and baked until golden brown. An easy and classic cookie recipe that’s perfect for parties, after school snacks and special occasions.
When the holidays roll around, I find myself in the kitchen whipping up plenty of festive Christmas recipes including Italian cookies , Oreo stuffed cookies , eggnog cookies , Nutella cookies and these beautiful little thumbprint cookies.

Thumbprint cookies are a classic for good reason – they’re simple yet look so impressive, and they couldn’t be any easier to make! You can customize your cookies by adding any number of fillings and coatings for a sweet treat that’s delicious any time of the year.
- Thumbprint Cookies Ingredients
- How Do You Make Thumbprint Cookies?
- Tips For Perfect Cookies
- Quick Tip
- Recipe FAQs
- Flavor Variations
- More Great Cookie Recipes
- Love This Recipe?
- Thumbprint Cookies Recipe
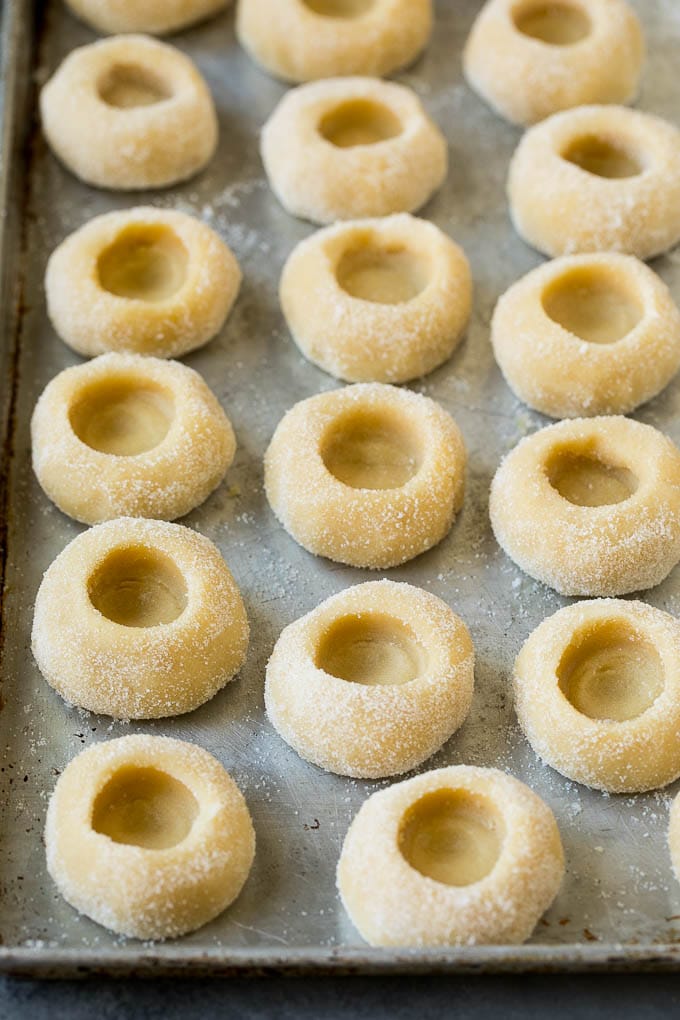
Thumbprint Cookies Ingredients
To make this recipe, you will need butter, granulated sugar, light brown sugar, a large egg, vanilla extract, all purpose flour, baking soda, salt and jam.
How Do You Make Thumbprint Cookies?
Thumbprint cookies are all about the perfect dough that bakes up crisp on the outside, yet soft on the inside. Make this dough by beating sugar, brown sugar and butter together. Mix in an egg, some vanilla, flour and baking soda and the dough is ready to go. Chill the dough in the fridge and roll it into balls. Dip the dough balls in sugar, then place them on a baking sheet. Press wells into the cookies with a spoon. Fill the cookies with a little jam, you can use any flavor of your choice. Bake until light golden brown, then cool and enjoy.

Tips For Perfect Cookies
- Keep the dough cold when you roll it into balls. If the dough warms up, it can get sticky and the balls can become rough instead of smooth. You can place sticky dough in the fridge or freezer to chill if needed.
- After you put the jam in the cookies, place the sheet pan of cookies in the freezer for about 10 minutes before baking. Chilling the dough prevents the dough from spreading too much as it bakes.
- Some dark jams and jellies can “stain” the dough of the cookies. If you are worried about staining, avoid using blackberry or grape jams or jellies. I typically use raspberry, strawberry or apricot jam.
- Make sure you don’t overfill the cookies or the jam may bubble over and run down the sides of the cookies.
- If your balls of dough crack as you make the indentations in the middle, your dough may be overly cold and stiff. You can simply patch any cracks with your fingers .
Quick Tip
If you have trouble shaping the dough into balls, try putting a little cooking spray on your hands.
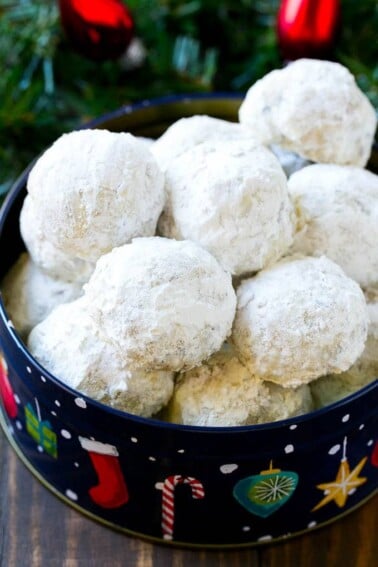
You can freeze baked thumbprint cookies. Just place them in an airtight container in a single layer. If you want to stack cookies, put a piece of waxed paper, plastic wrap or parchment paper between the layers. The frozen cookies stay fresh for about a month. When you are ready to eat the cookies remove them from the container and let them thaw on the counter.
There is no need to refrigerate thumbprint cookies, and they will stay fresh at room temperature in an airtight container for 5 days.
It’s very important to chill your cookie dough before you bake it. This will prevent the cookies from spreading too much in the oven.
FOLLOW ME
Flavor Variations
While this recipe is delicious as written, you can easily customize the flavors to suit your tastes.
- Coatings: Try rolling your balls of cookie dough in coatings such as sprinkles, coconut, finely minced almonds, pecans, walnuts or cinnamon sugar.
- Fillings: The filling possibilities are endless and include ingredients such as Nutella, lemon curd, chocolate ganache, marshmallow cream or caramel sauce.
This thumbprint cookie recipe is so fun to make because you can fill the cookies with all different kinds of flavors. This is a holiday classic that never goes out of style!
More Great Cookie Recipes

S’mores Cookies
27 mins

Monster Cookies
25 mins

Cake Mix Cookies
20 mins
Snowball Cookies
50 mins

Chocolate Spritz Cookies
20 mins
Love This Recipe?
Ingredients1x2x3x
- ▢ 1 cup unsalted butter softened
- ▢ 1/2 cup granulated sugar plus more for rolling the cookies
- ▢ 1/4 cup light brown sugar packed
- ▢ 1 egg
- ▢ 1 1/2 teaspoons vanilla extract
- ▢ 2 1/2 cups all purpose flour
- ▢ 1/4 teaspoon baking soda
- ▢ 1/4 teaspoon salt
- ▢ 1/2 cup jam
Instructions
- Place the butter, granulated sugar and brown sugar in the bowl of a mixer. Beat until light and fluffy, about 2-3 minutes.
- Add the egg and vanilla extract, then beat for 1-2 minutes or until well combined.
- Add the flour, baking soda and salt to the bowl. Beat until just blended.
- Place the dough on a large sheet of plastic wrap and form it into a disk. Cover the dough completely with the plastic wrap, then refrigerate for at least one hour, or up to 3 days.
- Remove the cookie dough from the refrigerator about 10 minutes before you plan to use it.
- Preheat the oven to 375 degrees F.
- Roll the dough into 1 inch balls, then coat each ball in granulated sugar.
- Place the balls of dough 3 inches apart on 2 sheets pan lined with parchment paper or silicon baking mats.
- Use your thumb, the back of a teaspoon, or the round end of a pestle to make an indentation in each cookie. Be gentle as you make each indentation so that the cookies don’t crack.
- Fill each cookie with 1/2 teaspoon of jam.
- Place the trays of cookies in the freezer. Chill for 10-15 minutes or until cookies are firm.
- Bake for 10-11 minutes or until light golden brown around the edges. Let sit for 5 minutes, then transfer to a rack and cool completely.
Notes
- Keep the dough cold when you roll it into balls. If the dough warms up, it can get sticky and the balls can become rough instead of smooth. You can place sticky dough in the fridge or freezer to chill if needed.
- If you have trouble shaping the dough into balls, try putting a little cooking spray on your hands.
Nutrition


Peppermint Cookies
Ingredients
- 3/4 cup butter softened
- 1/2 cup granulated sugar
- 1/2 cup brown sugar
- 2 eggs
- 1 teaspoon vanilla extract
- 1 drop pure peppermint extract optional if you like your cookies to have a more pronounced mint flavor
- 2 1/4 cups all purpose flour
- 1/4 teaspoon salt
- 3.4 ounce box instant vanilla pudding mix
- 1 teaspoon baking soda
- 1 cup Oreos chopped
- 1 cup white chocolate chips or chunks cut from a bar of white chocolate
- 1/2 cup crushed candy canes or peppermints
Instructions
- Preheat the oven to 350 degrees F. Line a baking sheet with parchment paper or a nonstick baking mat.
- Place the butter, granulated sugar and brown sugar in the bowl of a mixer. Beat until light and fluffy, about 3 minutes.
- Add the eggs, vanilla extract and peppermint extract (if using). Beat until combined.
- Add the flour, salt, pudding mix and baking soda to the bowl. Mix on low speed until just combined.
- Fold in 3/4 of the Oreos, white chocolate and candy canes.
- Take 2 tablespoons of dough and roll it into a ball. Repeat with remaining dough.
- Place the balls of dough 2 inches apart on a baking sheet. You will need to bake the cookies in batches.
- Press the remaining Oreos, candy canes and white chocolate onto the tops of the balls of dough.
- Bake the cookies for 10-12 minutes or until light brown at the edges.
- Cool the cookies on the pan for 10 minutes, then transfer to a cooling rack.
- Repeat the baking process with the remaining dough.
- Serve immediately or store in an airtight container for up to 4 days.
Notes
- Keep your Oreo cookies in larger pieces – if you chop them too finely your cookies will turn gray.
- I use chopped white chocolate bar versus chips because I like a chunkier cookie. Also, white chocolate baking bars are often made with real cocoa butter and taste better than white chocolate chips, which are often made with palm oil.
- After you’ve rolled your cookie dough into balls, you can press some pieces of Oreo, chocolate and candy cane on top for a nice presentation.
